Saturday, July 30, 2011

Uncovering the history of places that never were

Imaginary countries and settings have a long association with wargaming. Actually, fictional wargames seem to predate historical wargaming by about a century at least. There are various ways to tackle fictional armies from thinly disguised historical armies or a random selection of figures that catch the gamer's fancy to incredibly detailed fictional lands with their own histories, geography, politics and personalities, not to mention their own armies and uniforms.  As usual, I fall between several stools. I'm too lazy and unimaginative to do all of the detailed work  but I see no point in thinly disguising historical armies, I'd rather just invent a fictional campaign between historical armies. I have also been chary of inventing uniforms since it seem to threaten to leave me stuck with an expensive load of unsaleable trash if I were to drop the project or change scales. (Who, me?)

Having a purely fictional setting does offer some real concrete advantages to me though, what ever uniforms are worn. I have chosen to fit myself into the space that I have, and have decided that I want my troops visible, not stored away in boxes (as far as possible, at the moment my 1/72nd troops still live in the cupboard like their 15mm predecessors,). A fictional setting that allows me to play every kind of Horse & Musket / Colonial type wargame that I can picture, using a reduced number of armies, is a huge  advantage.
So, I figured it was time to rethink last year's plan. This called for a mix of 4 theaters of war involving  up to 10 armies including various rebels etc, with some overlap. These were:
  • North Eastern US-Canada Border covering from the war of 1812 up to the Rebellions with support from US Patriot Hunters.
  • California/Mexico/Oregon with an Anglo-Mexican force facing the Americans, both regulars and Texan like rebels, with a possibility of Russian intervention.
  • India:  An Anglo-Indian army facing a fictional Rajah inspired by the Mahrattas, Gwalior, Scinde and  the Sikhs with both European trained regulars and irregulars including Pathan like hill tribes.
  • South Africa With the British facing both Boers and various African tribes, real or imagined. I was tempted to add an arab/turkish element but felt that I had covered that sufficiently for now.    .
When I first started looking for a fictional setting for my Colonial wargames and wanted to expand it, (12 years ago), I had decided that I wanted to be able to game the following situations, after reviewing it, the list has not changed :
  • 2 opposing "European" armies facing each other
  • a "European" army facing "European" rebels
  • a "European" army facing a less effective "Native" army partially converted to European methods
  • a "European" army facing spear armed natives on their home ground
  • a "Eurpoean" army fighting a geurilla campaign against either/both mountain tribesmen snipers or mounted riflemen. 
  • battles in a Canadian looking setting,  green fields, mixed forests, stone and wooden rail fences, stone or clapboard houses etc
  • battles in an exotic location with palm trees, adobe houses, jungles and dusty plains.
My first, 54mm try at this saw the Nku-Khu and Emir's Lair come to life on the table covering the various Native options (see the early issues of the New Durban Times) as well as the first incarnation of Oberhilse and Faraway with Danes and Fenians facing off against the British. I wanted to include India but this kept getting put away due to the effort involved and the ;lack of anything that couldn't already be covered by the Emir.  

Having decided to resurrect Oberhilse and Faraway, I was tempted to just bolt a piece of India on below the mountains that mark the southern edge of known territory.  Somehow, it just didn't seem to fit but bolting on the old Nkhukhuland and Wadi  Foulyam on just south of the mountains seemed feasible. That is old territory though and one side was clearly British. Thinking about what would allow me to make the most of what troops were already raised or planned, I started wondering if Mexico could provide inspiration for all the non-European bits. What if the French or Dutch and not the Spanish had claimed Mexico or South America? What if instead of eradicating the Aztecs and Incas, they had opened trade with them as was done in India? What would a mid-19thC, unconquered Aztec or Inca army have looked like after 300 years of European contact?

It was at this point that it finally occurred to me that since I am relying largely on homecasting and home sculpting, backed by a few obscure, more or less OOP  commercial figures, all done in an old fashioned, lean look without exaggerated detail and painted in glossy toy soldier style, that there is no significant resale value for these armies and in any case, I can always melt down the figures and start over if I don't like where it goes. Not to mention that the evidence is good that this project will carry me 10-15 years at least and by then it'll be too late to bother starting over anyway.


I'm not sure what my "civilized" native armies are going to look like yet, except that they will probably wear white uniforms with shakos and/or strawhats and be based in stone or adobe forts as well as in their walled cities. The uncivilized spear armed jungle/mountain tribes will be based on the Prince August Skraeling molds with some additions and conversions to follow. They will doubtless be used as auxilliaries by which ever native civilization rules the land South of the mountains.  (naming suggestions are invited). 

The natives north of the mountains have of course been in long contact with the 4 European colonies and indeed interbred with them according to the notes I made 5 years go, and  have long ago adopted firearms,  horses and elements of western dress. The Frontiersmen of Oberhilse are their mortal enemies which makes Faraway their sometimes friend.

So, sorry to disappoint those whom I led to expect Sikhs and Afghans but not this year or next after all. Eventually? Who knows. 

Thursday, July 28, 2011

Not such a Grand Enterprise: Smoothing out Rough Wooing

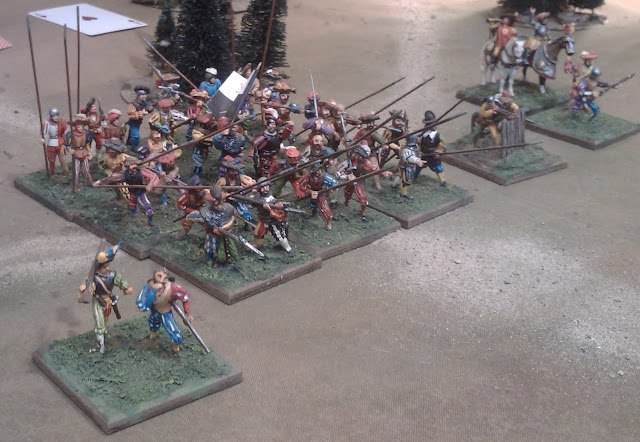
40mm Landsknechts, about 1/2 original homecast figures, the rest are a mix of Irregular, Sash & Saber, Doug Miller and Elastolin.

There were lots of things that I should have been doing today, too damp to scrape and paint the house, the grass could use some drying time, probably .....   but then there are tiles to layout in the foyer and the bathroom reno's to finish.  I don't bounce back from breaks in my routine or weather, long drives etc as I used to though and between spiking blood sugars and  the bloody heart medications with their "may cause fatigue", I have learned to be patient with days when I'm tired and fuzzy headed even when I slept well and the sugars are finally back to normal. Otherwise I am liable to end up wasting more time fixing stupid mistakes the next day than I saved by trying to force the issue. Luckily, if I screw up something in a solo wargame there is no harm done and if I waste time pondering a silly rule change, well, fixing it back is a pleasant enough diversion. So, after routine chores were done, I turned my mind to the 16th Century.

The 16thC is one of my 3 Desert Island pick contenders, you know, if you had just one period.... ancient warfare meets modern, knights in shining armour and cannon, Machievelli and the Chevalier Sans Peur, veteran professionals and raw levies, soldiers facing professionals across a field or breach in Europe or facing wild savages in the hills of Ireland or the deserts of Africa, not to mention savage Turks and Tartars. You get the picture.   The rules I use were adapted from Morschauser's rules by Rob Dean and myself nearly 10 years ago.  I have fiddled with them  from time to time since then but with insufficient games, it was easier to pick up on a few things that were wrong then it was to find solutions that worked rather than just making new problems. So in 2009, I put them aside apart from a New Years Eve game last December.

Without getting anymore tedious than necessary, the main problems were that the Command Control system was too random for my liking, the rules encouraged light troops to operate as single stands and then made it tedious to do so, The English longbows were just too deadly. and the melees were either too quick and deadly (cavalry) or tedious (pikes).  Having spent far too much time in the last year contemplating rule mechanics in general, I felt ready to tackle this again. Since Rob is safely lost in the woods of Upstate New York, it seemed safe to proceed.

In the last issue of Battle Games, Bill Protz presented a scenario based on an armoured breakout from a  bridgehead which I wanted to try. Gendarmes, Panzers, close enough. I made a rough translation of forces basically 1 company of infantry per infantry platoon or heavy weapon, 1 cavalry stand for each 2 AFV, and artillery in proportion, more or less.

This gave the following:
On the West Bank, holding the bridgehead: Sir John Smythe with 4 companies of billmen plus 6 of archers (later amended to 4 archers, 1 arquebusier and 1 sword & buckler).
On the East bank:
The Earl of Belmont with his bodyguard of gensdarmes, a heavy gun and a light gun
Sir Henry Percy and 5 stands of light cavalry.
Capt. Hauser with 2 companies of mercenary heavy cavalry.

Facing the English on table was the Rhingrave with 10 companies of Landsknecht pike supported by 6 of arquebusiers and 1 light gun. The gun and 2 companies of the arquebusiers were entrenched in a farm on a hill.

Off table was  Lord Home with a mix of 6 Scottish and French Light cavalry companies
M, Le Duc de St. Lambert with 2 companies of gensdarmes and 2 of lancers.

The first run through used a reversion of the rules to something closer to the original with more dice and armour saves for 3 classes of armour. The expanded command control rules, which separated the odds of something going wrong from what a unit or commander will do if that happens, worked well and felt better to me. The English longbowmen were still supermen and a number of other things just didn't feel right. Barely an hour in, I quit and reset the table, a rarity for me.  

I decided some more drastic action was required and spent the morning reworking the rules to get rid of the saving throws (sorry Rob), it also belatedly occurred to me that if I got rid of the things that made individual stands of light infantry the optimum, then I wouldn't have to deal with so many single stands. This had the usual knock on effects and resulted in some other minor but important improvements.

 A by product of a change in how hits are consolidated was an unsightly mushrooming of casualty caps. 
 Finally those little green dice I bought to mark Cold War Commander hits came in useful.

This game was much better, it was hard to tell if the longbows had been tamed since they appeared to have filled their quivers with nothing but 6's but it was a close fought game. An attempt by the Landsknechts to drive the English bills back over the river got hung up on a hedge. Finally both battles drew back 1 casualty short of being broken. Arquebus fire broke the English but just as the Germans were feeling smug, one of the English guns finally found the range and they broke in turn. It came down to a clash between opposing heavy cavalry which saw the Earl wounded and his men scattered. I made a few minor corrections to the shooting rules to match what I had actually done and set it up one more time (each game took about an hour).

 Once more across the bridge.

 This time the French and their mercenaries and allies picked up all the 6's leaving the English empty handed. Instead of sweeping away the Germans in the farm again, the archers and arquebusier bogged down while the billmen somewhat rashly advanced boldly to sweep the Landsknechts away and open up a path for the cavalry. Two companies of lancers rode forward to cover their flank.  After a stiff fire fight,  the arquebusiers and gun on the hill put paid to the last of the archers while the pikes held firm. The French gun supported by arquebusiers turned on the flanking cavalry with astonishing accuracy. The remnant fell back.

The opposing light cavalry deployed and charged into a huge swirling melee which say Percy and nearly 1/2 his men cut down. Both sides rallied  and then the French and Scots charged  forward again and swept the remnant  away. To everyone's surprise,  The Duc de St. Lambert suddenly appeared, much earlier than expected and led his gensdarmes straight into the already wavering billmen.  Behind them, the Earl was left as the only target for the French firepower, a cannon ball smashed into his entourage, then a bold arquebusier crept forward and had to be chased away. Before the Earl could rally back to a safe place, another arquebusier crept forward and just as the Bills broke.......

      .  
   Ok, maybe I need to revisit the translation of the forces to give the English a better chance but it was 2 fun games and I'm happy to put the rules out for more testing. (or see link at upper left). Not today though. Next up I give myself a day off, there has to be some time spent putting my games room to order and I need to catch up on painting and casting.

Tuesday, July 26, 2011

Tree Reconstruction.

I had it all planned out. Today was forecast to be cool and rainy (and it was, well cool and cloudy anyway) and I was going to get a 16thC game on the table, but....................

Anyway, I am almost finished the MacDuff update that I was trying to put off until at least August. Having put a lot of thought into the kind of game that I want to be able to play with the glossy 40mm toy soldier guys, why just using Charge! wasn't going to work and why is was just as well to have an element based Hearts of Tin game be different rather than having the rules converge, I figured, I'd best get a few things written before I forgot. Next thing you know.........

Almost everything in this version has been tried out but not in quite this configuration. Briefly, I am taking another stab at simultaneous moves with written turn orders ala Charge!, and the control check, after 20 years of service has been banished as being neither conducive ti a good game or a good or realistic rendition of friction, (I may re-introduce an optional role play version for solo games), variable length moves remain but rather than handfuls of dice, I'm going to try  average dice read in 100's of yards (players can then measure in mm, use 100 yd hexes (dum de dum de dum) or multiply by 4 to get inches), firing is still by groups of 4, but melee is back to figure vs figure rolls. Rallying hits and 25% casualties in 1 turn.meaning disorder are back as is the >50% break rule but all separate morale tests have been banished again.  I'm still checking .cross references and looking for missed bits but I'm looking forward to trying them out on the table so that if they are cast just right, I can get back to sculpting , casting and painting with an easy mind that the figures are what I will need..

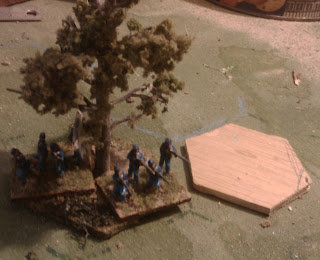
In the mean time, the other day I experimented with cutting hexagonal tree bases from some spare 1/4" plywood-ish type board. An irregular shape with rounded corners would have been good but I don't have a band saw, so, straight sided hexes it was. They were quickly sketched free hand so are a bit wonky but it was surprisingly easy to cut them. When I went to fasten on a tree and flock it, I was annoyed to find that  my glue had vanished, so, today I went out, replaced it and flocked the base. Then I went to grab the tin of foliage.....hmmmmmm .   I thought I had a tin of foliage..... oh well, I found a few clumps so fixed the worst ravages at time and voila a tree that fits in a 3" or 4" hex or no hex at all but won't fall over easily.


Now I need 2 dozen more tree bases for the portable ACW as well as several feet of 1/72nd split rail fences, sunken roads and stone walls. Wonder where all the 15mm ones went?


.  .     .

Monday, July 25, 2011

Dramatic Reconstruction

I struggle sometimes to explain why I like the approach of some games that are not "serious" simulations. Its not that its "just" a good "game". I've often said or written that I like my games to be  like a good historical film or novel, but I've never tried to elaborate since I've never really tried to pierce out why. Its certainly not  romance, character development or sub-plots.

There tend to be 2 besetting sins to some of my favorite games..

1st. They don't adhere to one viewpoint. The gamer can feel like a general directing over all strategy, but is also in the midst of the gun smoke and the cut and thrust of every melee. He fiddles with deploying troops from column but can step back and enjoy an over view of the whole battle, a view many Generals would have dearly loved. So, its not realistic.

2nd. They tend to rely on simple, direct mechanisms that in some way evoke real things even though they are just a game mechanics.  Take Charge! you control troops by writing out an order, they are just turn orders and there is no fuss about couriers or misunderstandings and blunders, but evokes all that. (and I've seen some blunders occur under the system, some even in my own handwriting!). Compare that to systems I have used/written where you draw cards or roll dice on a  chart to activate units. They may give a more "realistic" result but they don't  mimic any real process and I have seen too many occasions where the mechanism becomes larger in gamers' minds than what it is supposedly representing. In other words they start weighing odds, counting cards or indulging in similar irrelevant not to say inappropriate and un-general-like behaviors.

So where does the movie part come in? Well, I was thinking about a movie like Gettysburg. It includes us in discussions staged to show the thoughts of the General's and lay out their battle plans, it shows us over views of the battle so we get the feel of something big going on but then zooms in for a closer look at chosen incidents such as Little Round Top. More than that, it does it all without telling us what it is doing. The only background information is in the opening preamble or inserted in character's conversation or shown by the action on screen.

 Is the result an academic examination of the battle, what happened in detail and why? Hardly.  But do those who drop their critical eye, "suspend disbelief" and let them selves flow with the movie feel engaged, like they'd been there beside Chamberlain or that they had watched the battle unfold? Sure, for many of us, we do. For me, that's way the best games play out.

Sunday, July 24, 2011

More random thoughts about the Practical Wargame and me.

1. Terrain. Part of me would like to build some flocked or painted geo-morphic terrain boards with sculpted on hills and streams, or possibly flat reversible ones with painted on streams and roads and separate hills,  capable of being stacked and carried in a box  with troops and trees. But, have I ever mentioned how lazy I am?

Plan B was to cut down my Hotz map to just the right size and use the cut off bits to make hex shaped hills with matching grid and colours so that they appear the same as the flat ground but with discernible contour lines. Sounds like a lot of work aimed at a more rigid and less realistic looking final product. Did I mention that I'm lazy?

Plan C is to just find some grass green cloth, mottle it, draw on hexes and carry on with the rolling look.One can always use a bit of flock to indicate which hexes are slopes where it isn't clear.  I did consider finding some lighter green spray paint to update the mat I have been using but sure as shooting I'd find myself in the desert somewhere looking for a game and nothing but a green mat to hand.

2. Hexes vs Squares & Melee. Before I do a cloth, I thought maybe I should try the squares again since they seem some how more "in period". However, since I will be playing on hexes at Ron's, I decided it would be best to stay with hexes. However that got me thinking about the differences apart from the question of diagonal moves. The big revelation was looking at the melee rules.

Because units were never adjacent on the diagonal when using squares, you could never have more than 1 enemy adjacent to your front. Additional units, by definition, would be adjacent to your flank or rear,  If there was a friendly unit diagonally to your side/rear, facing forward, an enemy moving adjacent to your flank would have to face him, thus it would protect your flank. Even if isolated, it would take an additional turn for attacking infantry to move adjacent to your flank so there was time to react.

With hexes it is possible to have more than one enemy adjacent to your front, thus a line of 3 units can advance adjacent to 3 enemy units and then all 3 can attack the central one ignoring the other two units.   This just seems wrong but I have been at a loss how to propose a simple rule to prevent it, one that would cover all the odd and complicated cases that could arise, without encouraging manipulation.  There are two different approaches that both appeal to me.

The simplest would be  to say something along the lines that in cases where more than 1 attacker is adjacent to more than 1 defender, then all defending units which are adjacent to a unit on the active side must be attacked before any attackers double up on a defending unit.    

The other and possibly better route would be to define attacking, defending and supporting units. The attacker and defender would be the selected units which use their combat power and suffer any bad results. The supporting units are those which inflict a -1 to the enemy's combat power. Now allow the defender to use any defending units that are adjacent to an attacking unit but not them selves attacked, to support the defender.  Now when those 3 attackers advance and attack the center of the enemy  line inflicting -2 for being attacked by 3 units, the defenders could throw in the support of the 2 units adjacent to but not attacked by the enemy inflicting a  similar -2 on the attacking unit. Thus the attacker has a choice of concentrating on 1 unit, limiting his losses and having less chance of a mutual destruction  and more chance of a no -result/repulse,   or going 1:1 along the line with a good chance of all 6 units being destroyed. (opening a hole for his second line presumably).

Just some casual thoughts so far, I haven't looked deeply at the impact let alone tried them.


3. What is a destroyed unit? This isn't a rules question but for me its a key question for scenario design and especially for victory conditions and campaigns. To my mind, a unit destroyed at long range by a 5 or 6 on the enemy's first shot, probably suffered a sudden panic upon suffering casualties and broke to the rear. In a few hours time they could  probably be mustered with 75% or more of their original strength. I briefly thought about moving destroyed units to the table edge and allowing a chance to rally them but decided its best done after the game. It does bring up the question of different troop qualities but that's another question.

Units destroyed in close combat probably suffered heavier casualties including prisoners. Perhaps 50% or higher?

Am I going to track how many hits a unit took and how? No, just pondering.

If I make  an assumption that on average, including units lost and those only engaged, pinned etc,  between casualties, stragglers, and prisoners, each unit removed represents a temporary loss of 50%  of its strength and make another very arbitrary assumption that a small force might be able to keep fighting  until temporary losses reach 25 to 50% of its total then a 12 unit army could sustain between 6 and 12 units lost (representing the equivalent 3 to 6 units in terms of casualties) before being forced to retreat. In a 2 player campaign game, the decision would be up to the player, in a solo or non-campaign game, a die could perhaps be thrown once an army was reduced to 6 or fewer units with a score equal to or exceeding the number of units forcing retreat. Modifiers could be applied to reflect the holding of an important objective or various campaign concerns. For campaigns, the lost units could be diced for after the game. 5,6 restoring a unit for the loser,  4,5,6 in case of draw or 3,4,5,6 for the attacker.

Again not rules for the game itself but for a scenario or campaign.

Troop Quality. Not all units were created equal. So how do we represent that easily? My early attempts were to modify close combat values. That worked ok for 18thC games but is less relevant for 19thC ones, even the ACW. It seems to me that the biggest difference would be that elite troops might stick it out longer while poorly trained or demoralized troops would crumble more easily. The difference then would be not a modification of their ability to inflict damage but a modification of their ability to withstand combat. Without resorting to some form of roster or saving throws or having separate firing charts, the easiest thing might be to add +1 when  shooting at Militia/Poor troops and to -1 if shooting at Elite troops. Now this rather unfairly means that poor troops in the open would be automatically pinned  if the enemy had no minus but then they do seem to have been best placed in cover. Elites on the other hand could not be destroyed by fire once placed in cover, but they could be forced out into the open by multiple pins or destroyed by an assault.
Again just some thoughts, that I haven't looked closely at let alone tried.

The weather forecast had been for rain and cooler temperatures perfect for inside gaming but alas it appears to be a near perfect summer's day (?!). Sunny and hot but not too hot or muggy so it looks like I need to get some work done. Then maybe a little terrain work and some flags.


.


Saturday, July 23, 2011

One Willow - A Portable Civil Wargame

A hot  muggy summer Saturday and unable to stray too far, just the sort of day for some more Portable Wargame in the garden. Once more it was ACW and some unpublished  rules to try out.

Now Bob did not design the Portable Wargame as an ACW game so I occasionally find myself either shoe-horning the game to fit the rules or making adjustments to suit my own ends as well as my own tastes and prejudices. I am pleased to say that at the moment, the rules are working better and better for me. For the first game, I used the same activation and sequence rules that I used for the previous game, both based on musings by Bob. I accidentally forgot to switch the dice from 1 per 3 to 1 per 4 but I prefer having almost enough activation points each turn rather than never having enough so it worked ok for me. For the 2nd game I played it with 1 die per 4 units rounding up and it also worked just fine.

The big change was trying out additional pins causing a unit to fallback instead of being accumulated. 

Instead of an attack on entrenchments, I went for an encounter. The scenario was a variant on one which appeared in Courier a few years (decades) back. If memory serves, it was originally designed for On To Richmond. Nothing but the basic idea has survived  but I have used it several times. Essentially there is a road junction, usually a Y, with a bridge at the end of the long arm. Two opposing armies march on table along  the short arms with a mission of taking and holding the bridge. I placed a large but low hill in the middle and ruled that no troops could deploy off road until the enemy was sighted.


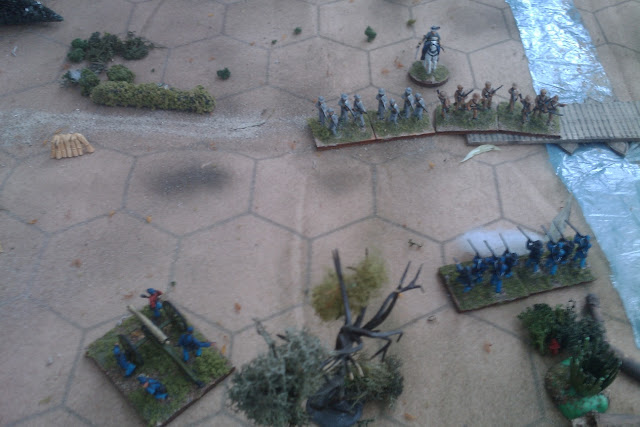
The "Y" turned into a crooked "T" but the over all layout can be seen here. Making PW scenery and a North American battlefield is now high on my "To Do" list.

I wanted a slightly larger game than the last one and briefly contemplated organizing the armies into 2 or 3 brigades, each with a command stand, artillery battery and 5 regiments but reason soon resurfaced. New rules are best tested in a stable environment, preferably the sort of one they were intended for. I settled on 2 armies, each of a Division Commander, 2 batteries and 10 regiments of infantry. (ie 12 units + commander), all the artillery were field artillery, all infantry were armed with Other Firearms (Rifled Muskets).    

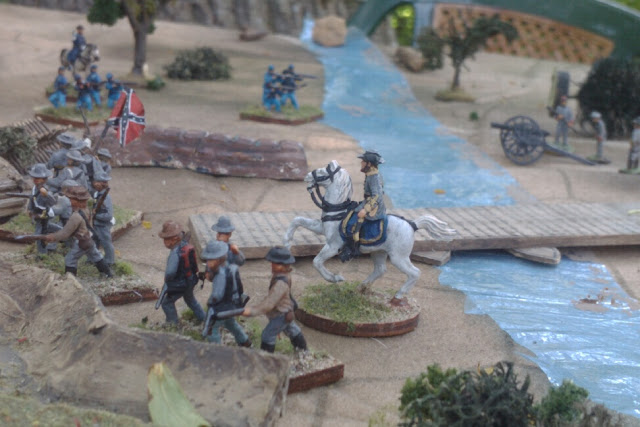
I can't believe I didn't see the mug when I took this shot from the bridge, It didn't give up either but kept maneuvering  around the table trying to sneak into pictures. I like the rolling terrain look but it does make it tricky sometimes to figure if a hex is table level or first contour.

The Rebs won the toss and got the first move once enemy were spotted. They moved into the farm and moved up reinforcements. The Yankees also started deploying and on the next turn combat began with a Reb getting a shot at 1 Yankee and rolling the inevitable 6. My eyes rolled and I thought, here we go again. ( I wonder where the dice were made and what their real feelings are on States' Rights and other subjects?

 First blood.

As the two armies started to extend towards the bridge, the first battery deployed and opening on the farm, pinned the occupants. One turn later the Reb's deployed a battery at the cross roads and wiped out the Yankee battery with its first shot. OK I thought, maybe the artillery rule are ok. It was the last hit for either side all game despite 3 batteries still being in play.

The fighting raged as the armies tried to fight and extend at the same time. I had deployed a cornfield intending it to block line of sight but not provide cover but of course forgot and it became full cover. To make  a long story short, within 10 or so turns the Yanks had lost 6 stands to 1 Reb and I was starting to wonder about army morale in the absence of a campaign setting. Initially I was thinking that the first army to lose over 50% would retreat but units die so quickly that the game easily became too short. I decided to push on for now and in a few more turns, things had evened up with just one little snag for the Federals, The Rebs had a slight superiority and control of the bridge. They could afford to sit back lob shells at nothing and wait. The Yanks had to press the attack, walking into the enemy  fire or give up the bridge.  
Using the cornfield for cover, the Yankees pressed forward and manged a 2:1 melee with a General in support. Mutual annihilation was the result and on the next turn a Reb counter attack was more fortunate. With only a commander, a gun and 2 infantry left vs a commander, 2 guns, and 4 infantry and with the enemy in possession of the objective, I called the game.

Due to the excessive numbers of 6's rolled by the Rebs early on, I didn't get to see as many forced recoils as I expected but those I did have worked well. It didn't take long for a unit to be forced back with no where to go. My instinct was to push  back and pin the unit that was in the way but it made more sense to be consistent with the melee rules and remove a unit that is unable to retreat. The thing that tripped me up is that the only thing blocking the retreat was a lone general on a horse. Now, based on the Movement and Combat Value of command stands, they seem to have a built in cavalry bodyguard. This wasn't exactly typical of ACW Infantry Division Commanders so I hedged and hemmed and hawed and allowed the unit to retreat onto and stack with the commander. I think this will end up being one of those house rule things with an option for command only stands with little or no combat value on their own but able to stack with a unit.    
  
The artillery, however, just didn't feel at all like ACW artillery, it felt a bit more like 16th C artillery. With some trepidation I decided on a drastic solution. I dropped the "to hit" roll and just rolled for effect. To reduce the power a little, I added a modifier: -1 if firing over 2 hex range.

Time to play again. 


One thing not rules related that I wasn't happy with, was the look of my game. Apart form the shabby, improvised terrain in the wrong colours, the small stands of soldiers just didn't look the part, a purely subjective impression. I had only used  1/2 of the stands that I brought downstairs I had two choices, double the number of units as originally intended or use 2 stands per unit. I opted for the latter. 

  Here they come agin and thur's twice as many! 
When the first (Yankee of course) unit died, I was tempted to just take off 1 of the 2 stands but I didn't want to start experimenting so just took away the whole thing. When using 2 stands, I usually deploy them one behind the other when moving by road but 1 beside the other when deployed for fighting, just for the look of it. At one point during the 1st game, the Rebs were lined up along the road, firing their rifles then moving at road speed to the flank. That just didn't feel right and with 2 stand units, I momentarily started playing with ideas for road columns then remembered that normally units are 1 stand so thought about "If you shoot you can't use road movement". That would add the unnecessary complication of needing to remember who shot and who didn't so I settled for saying that if one of my units uses road movement, it has to end its move facing along the road and left it at that.      .   


Two of my 40mm wide bases don't quite fit on the 3" hexes but close enough and they'll work fine inside on 4" ones. 

The Federals seized the initiative early on and managed to cut the Confederates off from the bridge. They were powerfully assisted by their first artillery battery which informed of the new rules, joyously began throwing 6's on every other roll till a Reb battery blew them apart upon which all of the artillery settled down and started rolling average sorts of scores. The new rule did have a powerful and positive effect. Artillery suddenly became a dangerous and important part of the forces on table, being especially valuable for suppressing the enemy before the toss for initiative and making units vulnerable to being driven back by rifle fire before they could rally. Their vulnerability to close assault had to be kept in mind though, especially if there is cavalry about, and infantry detailed to protect them.
The Rebs push on despite heavy casualties.
A stray shell seems to have cut down a fir tree. Hex shaped tree bases are probably in order.

With heavy casualties on both sides, army morale became a question again. Just how important is this bridge and what do all those destroyed units really mean? And what time does the sun go down? The Federals held the bridge but both sides were down to 30% of their original strength. I decided that destroyed units were merely temporarily combat ineffective and played on. Both sides pounded with their artillery. The Yankees content to stand on the defensive, the Rebs easing to their left and looking for an opening. They managed to slip into a patch of woods within rifle range of the Yankee line and with 2 successive pins, pushed the Yankee infantry back from the bridge. Now the Yanks needed to counter attack. The Rebs shot them down then shot the commander. That left only 1 Federal infantry unit and a gun facing a commander, a gun and 2 infantry units. I decided the remaining Bluebellies would fallback in good order protecting the retreat of the rest of the division. .
 Soooo close, they had been sooooo close.


This had been a GOOD game and felt good for the ACW, not a detailed simulation but it still felt right. It's almost time for me to start thinking about writing up an ACW supplement. 

Its also time for me to start tracking turns more closely and thinking about scenario length and victory conditions including maximum losses.    

    .

Wednesday, July 20, 2011

The Battle of Rabbit Run - A Portable Civil Wargame

A picture for Dave, E-bunny and Xena Warrior Bunny, do their best to ignore the upcoming conflict at their very door step.

By the time Kathy had made her early morning departure (i.e. around 1:30 in the afternoon), any good intentions of getting some chores done had evaporated. All was quiet on the home front so I turned my attention to the  ACW troops. The latest plan for these 1/72nd armies is 3-5 stands per regiment for use with Tabletop Teasers.  I wasn't sure the garden table was big enough to handle the job so I started eyeing the spare 4x5 sheet of plywood in the garage and contemplating scenery. It was all starting to seem like a lot of work when suddenly one of those little cartoon light bulbs came on. The whole point of the portable wargame, or well one of the points anyway, was being portable! With the Hotz 3" hex felt and 1 stand per unit, I could fit a nice little game into a small box, take it out in one load and be under way in no time. All I needed was a scenario.


20 July, In a surprise move, the Rebs under General W. Rider have thrown a pontoon bridge over the Rabbit Run and entrenched 5 regiments of infantry plus a battery to defend the bridgehead..  General I Taleri with 9 regiments and 2 batteries has been dispatched to drive them back.  The terrain around the bridgehead was hilly with several small patches of woods. To the north the terrain provided a covered approach for the Union, a hill to the east provided an artillery position just able to reach the southern end of the Rebel entrenchments.   The rebel artillery was posted south of the river while 4 regiments manned the entrenchments with the 5th regiment being held in reserve.

The battle began with a lengthy and completely ineffective bombardment by the union artillery. Six regiments were dispatched to advance through the dead ground to attack the rebel left. Three regiments were posted on the left to threaten the Rebel right and to neutralize the Reb artillery. The boys in blue deployed into line behind the hill and woods then surged over the top. One volley from the ragged rebs laid low 50% of the attacking wave. The left flank moved forward, losing 1/3  of their number to artillery fire but managing to get close enough to shoot down the gunners across the river. The determined Yankee wheeled to the right to charge the redoubt  as the remnants on the right wing advanced and opened fire again, finally taking out a rebel regiment.. The rebel rifle fire merely increased in intensity, knocking out 2 more regiments  and forcing  General Taleri  to order the remnants of his Division to pull back and await reinforcements. (Losses: Union 6  out of 12 units, Rebs, 2 units out of 7 units)

  Mid way through the first game.

It didn't take long for reinforcements to arrive, This time, the artillery quickly found the range. The Federal left wing advanced but were unable to silence the Confederate guns.


 In the end, that didn't matter, the right hand regiments massed in dead ground, chose their moment then rolled forward. An ineffective fire failed to stop them and the garrison was shot down in short order, allowing the Federal infantry to occupy the trenches without opposition. (Losses Union: 3 out of 12 units, Rebs, 5  out of 6 units)


I actually played this game 4 times but only twice all the way through. The plan had been to bring on Confederate reinforcements but I cancelled them before they could get into action. I used Bob's musings on possible changes including a fire phase before the activation rolls, the simpler way to calculate activation points and the multiple pins. Actually,once I started tracking multiple pins, the question arose of whether the  fire modifier was -1 if pinned or -1 for each pin marker. I decided the latter made for a better game and adopted it. At one point in the third game, the rebel artillery had 5 pin markers on it, effectively silencing the battery even though the Feds couldn't roll  a 6 to save their lives.

Actually, the die rolling all afternoon was extremely skewed. In the first game, the rebs won every crucial initiative, getting in the first shot and then to add injury to insult, killed 3 Northern stands with their first volley of 4  dice of rifle fire. The union artillery on the other hand was unable to inflict any noticeable damage through 10 or 12 turns of fire by 2 guns.

For the 2nd game, I cut the rebels back to 4 stands of infantry and decided that since the rules are aimed at breechloading rifles of the late 19thC, I should downgrade the ACW rifled muskets to "other" firearms. This made a big difference to the feel as the armies were able to get quite close before stalling and.or dying. The artillery in particular benefited  as the infantry was unable to approach within small arms range without taking cannister fire. Since the reb artillery managed  to roll 5's and 6's with 2 out of 3 shots,   this was rather nasty. On the other hand, this time, the Rebs got the 1st fire but blew their shot at the Yankees despite the support of their General and were then overwhelmed  by the fire of the advancing  Yankees, losing 1 or 2 stands every turn even though 6's were needed. No one lived long enough to require any melee's to be fought.

I reset the game again using the 3 hex range but again the dice were lopsided, the Union guns,  couldn't hit anything. True, they did land 3 out of 20 shots into the compound but even with the +1 for the general, they only suppressed 1 stand, once. On the other hand the Rebs won every initiative which mattered, getting in the first shots and rolling about 30% 5's and 6's, slaughtering the bluecoats. It was Marye's Heights all over again. I finally stopped the game and reset the table with 9 Yankees assaulting 3 Rebels, no guns, no generals. It was a walk over.

During the first 2 games, I felt so frustrated that I started thinking of all sorts of modifications but eventually I decided that the extreme dice rolls were twisting things but as ever when dice are involved  will happen now and then and decided  that the real solution would have been a bugger game so that 1 or 2 rolls would be less crucial. Instead of 12 attackers facing fewer defenders, I should have fielded 12 defenders and increased the attackers to 24 or so.

On the whole, the new firing rules were a BIG  improvement but I am still wondering if the Pin rules are worth the extra hassle or if perhaps its just that the Pin is too easy to inflict. The one time in the game that I almost had a melee, 2 units vs a pinned unit in cover, I was disappointed that the pin did not weaken the defender in a melee. My troops stopped and shot.

I also find the artillery very frustrating. I'm thinking of an amendment along the lines of once a battery hits a target, further rounds will automatically hit the hex and the guns need only roll for effect until they switch targets.

The ACW and the PW will be back next week.


..    

Tuesday, July 19, 2011

Summer Quarters

Here in Nova Scotia we can cope with cold and snow so no need for toy armies to go into winter quarters.  Heat and humidity in summer? No that's a different thing, even though I was raised in Montreal which is hotter and "humider" (sic), I am well acclimatized now and 27 to 30 degrees is hot enough for me to suspend any but essential operations. Still,  though my gaming/painting room which is on the top 1/2 floor of this 150 year old farmhouse is  uncomfortable during afternoons and evenings and I am starting another stint of double duty tending to an aged mother in law in addition to various hounds, bunnies and what not, one can't give up all together.

Plans for the next 2 weeks include:

a) 16th Century Command Challange. I have been revisiting Rough Wooing, backing off some of the changes introduced in 2009 amongst other things. To test things out, I intend to set up and play the latest scenario published in battlegames.

b). Deja Vue Again. I thought I was done with Crysler's Farm and done with Charge! for another year but after looking at how the game could be worked using Charge! in response to a post on OSW, I feel curious enough to want to actually try it.The result will help me decide whether to pursue a version of MacDuff for use in Faraway or whether to just make some solo-game tweaks to Charge!

c) A Portable Game. The room upstairs may be hot but the garden table under the Willow is most pleasant. Dragging the 40mm metal figures down stairs and out to the yard sounds like work but 1/72nd plastic forces should travel easily. ACW or RCW?

Saturday, July 16, 2011

After Effects, Random Thoughts and Future Games

A 1/48th ish die cast Motor Car from the Flea Market. As I suspected, it fits the Zinnbrigade seated 1900 Prussian gunner perfectly. Only 2 questions remain: what exactly am I going to do with it and  why the Heck didn't I buy the other one?

The inevitable result of exposure to many different games, not to mention  the result of playing 6 games of Charge! and lots of time to think on the less busy stretches of highway, is an evaluation of plans and possibilities. Luckily, this year, there was nothing to upset any apple carts, just food for thought. In no particular order:

1. Terrain. Once again, I came across  a  realistic terrain layout that impressed me. By realistic, I don't mean heavily dry brushed with oversized, over detailed buildings but a layout that reminded me of what I see when I climb the hill across the road and turn around. Naturally rolling hills, fields marked out, subdued greens and browns in many hues, trees and houses looking in scale nestled beside the inevitable too small figures.   As often, this was a terrain board. I did a series of these in the 80's and was happy with them till I got tired of the limited arrangements and difficulty of storage that discouraged me from doing more and finally resulted in their damage. An alternative that I have used with success in the past is a cloth laid over hills but this is not friendly to singly mounted  40mm figures. I still think my planned 3/4" pine boards cut into step hills, painted to match may give a suitable basis for an acceptably pleasing rolling toyish country to play over with just a touch of a Wellsian or Grantian air.  If not, there is always the 1/72nd ACW armies which will stand well on a rolling cloth.

2. Toy Soldiers vs Elements. I'm not talking basing here but of the general thrust of the toy soldier style of treating a figure as a figure (whether based singly or on multi-figure basing) vs treating a unit as a unit. I find merit in both approaches  and some projects will be one and some the other but my main 40mm project has hung in the balance for several years now as I flip flop between the two. Last year it tilted again towards the old approach and last week's Charge! games and contemplations about big battles vs small actions has only strengthened that.

3. Scalability and Historicity.   These are   two completely separate issues that just happen to come together. The two opposite ends of the pole are what I have called "the universal soldier" like Charge! or TSATF where the same figures and rules are used for skirmishes and battles but neither are quite right or at least not consistent in detail and scale, as opposed to a series of separate projects, different rules, different organizations, often different figures sizes, all for the same campaigns (eg 28mm skirmishes, 10mm big battles etc). I like the idea of the universal soldier concept for my current main project (Mid-19thC Not Too Historical Toy Soldiers) but it inevitably bumps into the  question of historical "accuracy" and "scale". When I wander about and look at games where consistent scale and historical accuracy of organisation etc are paramount, (usually big or medium sized battles) and compare them to other games, including  Sci Fi games, where things are subordinated to the story, the game experience, the look of the thing, and "feel" (usually semi-skirmish games) then I invariably prefer the latter. When I get home, I find myself starting to obsess again about consistent scale and big battles. I think I need some kind of 7 step program  to cure me.

Big Games with Small Figures vs Small Games with Big Figures. This is closely related. (Small games with small figures and big games with big figures are quite different topics.) It seems to me that "serious" historical wargaming cries out for large armies of small figures deployed on big tables. I saw several such games at Historicon, some very impressive looking and once upon a time I might have been inspired but I didn't feel the slightest regret at not being signed up to play. Part of me mourns this lack of desire but mostly I wonder why that lack should bother to me. Looking back over 40 odd years, the vast majority of games that bring the fondest memories have been of the toy soldier, off scale, high-imagination, low recreation, story heavy games. So why am I finding my self stuck in between these days, not quite doing either?  There is some internal source of confusion that I am missing.


So?  There we are, added together, I think it means that in theory, I am on the right over all track for me but that I need to reverse last year's decision to drop the fictional Oberhilse & Faraway setting in favour of alternate history. Some how a completely fictional setting is more liberating, at very least reading history won't conflict with what I'm doing.  It also means that I'm glad I have side projects, perhaps one of these could be more historical? Mind you another conclusion reached is that I need to focus a little more........  plus ça change......


 One from the archives. A game that never actually was.


Quick Fall Plan. Here's what I see myself doing in the  near future:

1) 16thC. Time to break out the Rough Wooing lads, play some games, paint a few figures, (not many) Cast more, and try out some scenarios.

2) Portable Wargames. Finish up my 18thC Turks and get some games in with Ron
.
3) 1/72nd ACW. Kidnap Jerry and force him to play a game.

4) 22mm Ancients. I don't know.  Ron is working on a hex based new 25mm Romans vs Gauls game and I think rather than worry about it, I'll just show up and play (I've painted 1/2 or more of the Gauls anyway). Some of the other guys have been poking at Basic Impetus for big 25mm or 15mm and if I feel ok Sunday I'll drive out and play but I have no desire to get back into face to face games. I may just putter away in the background doing my own solo campaign in old 25mm.

5} The Main Event.   I think I'll let it slide for a few weeks then kick into gear as we get into fall. Winter of 2011/2012 HAS to see armies, terrain and rules including some VSF aspects to ensure no one takes it seriously, all starting to flow and be presentable. Mini-con ready if you will if not con ready.
I have decided to resurrect Faraway for the 3rd time. The question remains do I push on to India? Its almost too late if I want to consolidate. In an imaginary setting, masses of  Mexican like lancers and white clad infantry in shakos or sombreros manning hill forts with geurillas hiding in the mountains along with tribes of spear and shield wielding natives and irregular mounted Boer or Metis style hunters would seem to tick enough of the boxes. Needs thought, fictional background and sample figures. This is the as yet undrawn land south of the mountains, who knows what really lies there?


Thursday, July 14, 2011

Once more unto the breach. The 3rd siege and the Relief (or not) of Adelheim

The sort of damage a Ricochet Battery can inflict. This also shows the sort of compromises that are often necessary when making practical terrain for 40mm games. The Ravelin needed a gateway, wide enough to admit a wagon. To include a gun port on the same wall would have threatened the structural  integrity beyond tolerated standards and so we simply sealed the gateway with gabions once the siege got under way. The gabions, by the way, are solid wood doweling cut to lengths with wicker work being suggested with paint and a coating of sand filling in (sic) for the earthen stuffing. 

One of the things that happened to me during my solo test was that I placed the 2nd parallel too far from the fort, at a range where there was no serious threat of a sortie. When it came time for the 3rd parallel, either it would be too far from the covered way or too far from its supports. Digging 4 parallels would be time consuming and smack of not knowing what I was doing. I opted to go too far from  my supports and was hit by a sortie. Looking at the 2nd game, where the defenders hadn't chosen the location of the 2nd parallel, I realized that we had inflicted the same difficult choice on them, They had taken the same option as I did and suffered the same fate. Hmm How about that, again very simple rules gave the right results. The first team, those who had placed the parallel had chosen the first option and extended their siege by several days. When it came to the 3rd game, I suggested that we push the second parallel forward slightly and let them start from there.


The 3rd game proceeded smoothly with the attackers advancing methodically, alternating batteries with partial parallels and giving the defenders no opening for a successful sortie. At last the 2 armies were entrenched within a grenade toss of each other. It was time to "crown the covered way". The front parallel filled with troops and at the assault went in.
Losses amongst the infantry on both sides had been relatively light to this point and the resulting battle was fierce and bloody. The attackers were not successful every where but they drove enough of the defenders back that they were able to rally then storm two of the redoubts.
On the next siege turn they succeeded in digging breaching batteries into 2 of the redoubts and alongside one face of the Southern bastion. At that point, time was up and we decided that if the fortress was not relieved, it would have to surrender.  
We cleared the rear 1/2 of the table and set up a prison depot for prisoners taken during the storming of the covered way and a small supply depot. Four squadrons were deployed to defend the depots and 1 company of infantry split between the 2 compounds as a garrison. Two additional companies of infantry were detailed  to march from the trenches as a reaction force.

The relief force, an advance guard presumably, was composed of 4 squadrons of cavalry and a light infantry battalion. Their goal was to free the prisoners, destroy the supply depot and inflict more damage than they suffered. The more of these tasks that they accomplished, the more likely that the siege would have to be broken off.


We weren't sure that this was a large enough force but a very interesting little game ensued.  


The relief force caused itself a little trouble by having a squadron ride between the light infantry and their target, the prisoner compound, and then back again, but they managed to throw a squadron of heavies against the heads of two  columns of  light cavalry. After 2 turns of melee, the light cavalry which had been unable to exploit their numbers, were defeated and removed from the game for 3 turns. Beyond them a series of charges between the Allied Hussars  and Fitzjames Horse finally resulted in the Hussars being driven from the field.

Once the way was clear, the light infantry showed its worth by shooting up the garrison until it was understrength  and had to retreat. Unfortunately, the time lost meant that supports were entering from the back just as the jaegers went in the front. An even melee resulted in the light infantry being narrowly evicted.

A squadron of cavalry, slightly weakened by previous shooting, now tried a frontal charge on the remaining company of infantry. A risky business but necessary. The infantry won the toss, fired at short range and fired well. The cavalry did well in the melee but only well enough to draw. They pressed ahead and were suddenly  faced with overwhelming numbers of infantry. By the end of the melee they were understrength.

It was all down to the light infantry. As they deployed to fire on the cavalry, a squadron each of the rallied Carabiniers and Fitzjames Horse crashed into them. Firing high, the light infantry broke and ran. There was to be no relief for Adelheim.


So that was it, another HMGS con over and done. I greatly enjoyed my part in this series of games. Many thanks to all those who played and to my comrades in arms who worked so hard on the fortress and on running the game. Discussions are already underway for next year. The NQSYW may appear again, then as well as before, but look for pikes and cannon the next time I head south.

Unto The Breach - Friday's Siege Games


The Colours of MacDuff's Fusiliers wave proudly as the grenadiers move up for an assault.

When we started out to stage a siege game, I wasn't sure it could be done as an interesting convention game, or an interesting game at all for that matter. The solo play test was enough to alleviate fears on both scores but many questions remained.

Friday Afternoon, the 1st saps are planted.

The original plan called for a 10 foot wide fortress front with 3 bastions and enough pieces were cut to allow for that but once it became apparent that the fortress was going to need over 3 feet of depth, we became uncertain that the remaining space was sufficient for the besiegers. After my play test, I was afraid that a 6 feet front would not be wide enough  for zig-zag saps and batteries but a depth of only 3 feet for the attackers would mean starting at the 2nd parallel at best, in other words skipping the beginning of the siege.  After discussing the pro's and con's we ended up agreeing to lay out a 6 foot front and start the 1st parallel 6 feet from the walls. After the play test, we moved the parallel slightly forward to put it 5 feet from the ravelin, allowing effecting fire by the besiegers from turn 1 (well, for most of the besiegers.)  One thing that became obvious during the playtest, was that the compressed front made it difficult to plant richochet batteries against any point except the ravelin but that the saps were easily enfiladed if the players weren't careful. Both items went into player briefings  and didn't seem to present any great difficulties during the games though some of the saps were less zig-zaggy than our test ones had been. (it was easier to just point them off table and sap forward in leaps and bounds, the end result and purpose was the same.)  We were also afraid that a single 3-4 hour game might not be enough so allowed for a 2nd game to follow on from where the first left off.
Friday afternoon, a second parallel has been planted and the saps continue.

As we prepared for this game, it became obvious that many things had been glossed over or assumed when the brief rules were laid out. How many troops and guns should be used? How many engineers? Could you pack several into a sap? Why are the tactical rules so close to Charge! without being precisely the same? Abridgment or amendment? Can you fight from a sap?

To avoid confusing people, we opted to follow Charge! where ever possible. This meant that guns firing from over 2 feet were inflicting 1/4 casualties rather than 1/2 but, on the other hand, it looks like we might have fielded more guns per foot than Duffy did.

Initially we planned to limit the supply of engineers so that the siege might be ended by losing them all but in the end, we treated them as a limited but inexhaustible supply. The besiegers had 3 each turn, 1 and only 1 of which could supervise a battery or sap. If a parallel were to be dug, even a partial one, each engineer could supervise 1/3rd of it. That  meant that a few lucky 6's wouldn't end the siege but the loss of an engineer meant the loss of a day's work on that section of work.  Rather than fussing about where the engineer was placed and dicing a la Charge! to see which figures were hit, we merely rolled a die with a 6 indicating that the engineer was hit. We did the same for gunnery officers.
Rob and his son, Norman who did the finishing work after Duncan's wizardry with power tools did the basic construction, watch the besiegers sap forward.  (My only input this year was in planning)

When a sortie or assault was announced, we made players declare which troops they were committing. Only committed troops could fight and only against other committed troops. Any troops committed to a tactical turn were not available when we got back to the siege turn. We did consider not carrying out a siege turn if there was a tactical but that seemed like it might encourage the besieger to launch feeble sorties every day so we laid out digging and did troop moves, then resolved tactical combat then finally did the siege bombardment. Troops who had been deployed to dig were not allowed to fire but were allowed to defend themselves in melee. (For that matter, no firing was allowed from a sap and only 1 rank of figures allowed to occupy it. Parallels included a firing step and had room for 2 ranks.) If enough survived the sortie, the sap etc was built. In practice, it was up to the supports in the parallels to drive off the sortie and as in play tests, attempts to drive forward too quickly without supports tended to be costly to the attackers. If an attack, or counter attack, went beyond the initial goals then more troops could be committed once the situation changed (for example, an escalade following a repulsed sortie)

    Friday afternoon, the 3rd parallel is placed  
Once again, Duffy made no mention of reduced moves if "obstructed" or firing but we adhered to Charge! on both accounts. In retrospect, I am interesting in trying Duffy's simplified tactical rules as written to see of it picks up the pace and captures that desperate scramble aspect that I imagine for sorties and especially for forlorn hope assaults. On the other hand, the sorties and assaults were exciting as it was so why mess with something that works?

The last game had to be called shortly after the relentless advance of the siege had led to the defenders being forced out of the covered way with insufficient reserves of men and guns to stop the attackers from planting Breaching Batteries and forcing a surrender  within a few days time. Another hour of play would have reached a more satisfying conclusion but we just didn't have it. Unfortunately, the game had progressed too far to start the 2nd game at that point. After a quick huddle, we stripped every thing back to the 2nd parallel and started the 2nd game from there. All that would be lost would be a few turns of relatively ineffectual fire and some practice at digging. (yes this means we probably could have played across a 3 bastion front, starting from the 2nd parallell, maybe next time.)

 The Grenadiers of MacDuff's Fusilers have moved forward for the Big Push. Supported by the Queen's Brigade, they wait for the word to go........

 "Over the Top" 

So far, the first game had been quite different from the play test apart from the ability of the besiegers to smother the defender's fire. We were eager to see if the next game would be different again.  Oh...yeah! Unfortunately, while I had had my cell phone in hand to take a few snaps of the 1st game, I got too wrapped up in the 3rd game and completely forgot to take pictures!  I'm trusting that Rob who had his real camera out during the weekend will be able to provide some.

Its always hard in a system like Charge! to figure out the exact impact of potentially widely varying combat results dice. In the 2nd game, a pair of veteran gamers, each claiming a reputation for "Cold Dice"  were matched up against two younger but not inexperienced gamers defending the Family Fortress.  I have to say that as far as I can tell, the attackers rolled just as many 6's as the defenders but the defenders rolled 6's while trying to claim special effects or officer casualties while the attackers seemed to like to roll them looking for say "2 or better" to hit, saving the 1's for when they wanted to destroy a gun or do some real damage with a volley of musketry.

The end result was that by the game's end, the attackers who had started with 12 guns to the defender's 9, (hmm wasn't that supposed to be 8?) were out gunned by the end.  That doesn't tell the whole story however as the attackers, despite heavy losses,    sapped forward,  planting a parallel almost crowning the covered way. The defenders launched a massive sortie but the attackers reacted with full force, rushing reinforcements up the saps and across the open ground. The ferocity of the counter attack and the doggedness of the defence of the saps, catching the fortress commanders a bit by surprise. Two thirds of the parallel was delayed by a day but the sortie took such heavy casualties that it restored the balance of power between attack and defender.

Undaunted by losses of time, men, guns and engineers, the siege continued. The parallel was finished and the saps pushed forward. As the defenders evacuated the covered way to conserve manpower, the attackers launched  a surprise escalade of the now undefended ravelin (they had expected it to be lightly held).  It was the turn of the defenders to be caught off guard and forced to choose between abandoning the redoubt and covered way thus allowing the attackers to place their breaching batteries, or counter attack with every available man. Like a ant's nest that had been stirred, men came racing to the defence of the ravelin. A confused melee took place in the gorge of the ravelin, a series of 1 to 1 combats. Its no wonder that I forgot to take pictures, amid such excitement of sorties and assaults. Perhaps if the Rosish troops hadn't been evicted from the ravelin in the end.... 
 
In the next post I will conclude with the 3rd siege and the Relief game.


Wednesday, July 13, 2011

Rolling, rolling, rolling, keep them wagons rolling. Game 1.

I would love to be in a position to present 5 detailed battle reports but alas I took few pictures, no notes  and wasn't on the ball enough to grab the order pads, therefore as memory's lamp is already dimming, only the most vague and disjointed accounts are possible. The only saving grace is that some interesting tactical and gaming lessons remain reasonably clear and hopefully may be of some interest. (More pictures of the games may be seen at Rob's blog and Norman's blog.)  BTW, if any of the players are willing and able to add a comment explaining their plan or relating their experience of the game, please do so) 


The Situation.  Notionally, this year's games comprised a reprisal for last year's Raid on St. Michel.  The Northern Alliance led by Rosmark, has invaded Schoeffen-Buschhagen seeking compensation for damage done. To enforce their demands, they are planning to lay siege to the fortress of Adelheim.  Some of the Pragmatic Allies who had composed the raiding force last year came to the defence of Adelheim,  one joined the Northern Alliance, and the rest stayed home.  (in reality based on what troops were required for the games rather than on any political machinations)


GAME 1. Stocking the Fort. The 1st game was a variation on the Wagon Train scenario from CS Grant's Scenarios for Wargamers played as a straight up Charge! game with 3 infantry or 2 cavalry or light infantry companies/squadrons per scenario unit .  The goal for the Pragmatic force was to get 4 or more wagon loads of supplies into the fortress. The goal of the Northern Alliance was to capture at least 4 wagons.  Their force was the largest but they were scattered and marching on at randomly selected times and places.  As it turns out, they came on in a remarkably compact fashion with only 1 gun arriving from the North.    1 cavalry regiment failed to show but alas it was due to GM confusion rather than the dice.  (Sorry lads!)


The only picture I snapped, Not exactly an ideal shot. There is at least 1 more on Rob's blog.


Four notable things stand out in my memory. 


Light Infantry vs Cavalry. The first was a charge by 2 squadrons of Dragoons upon the Pandours, a light infantry battalion. The authors's commented that a unit of light infantry must shoot well to survive a cavalry charge, and the Pandours had heeded their advice. Winning the toss, they fired at short range and scored incredibly well, despite the 1/2 casualties for cavalry. In the melee, they did quite well in the 2:1 combats and at the end of the 1st round, the melee was drawn with the cavalry being only a few figures above being below strength. I think I would have pulled back, content to have done damage to the light infantry and  tying them up for two turns but the cavalry commander was made of sterner stuff and demanded a 2nd round of melee. Being heavily outnumbered, these combats were all even up. If the dice in the 2nd round hadn't favoured the cavalry, they would have been wiped out but as it was, the final result was a drawn melee with the cavalry being 1 figure above under strength.     


Grudge Match.  The 2nd was a clash between old enemies the Allied Hussars and Rosmark's Yellow Hussars. Last year the Yellow Hussars won every encounter hands down, filling the prisoner cages with Wachovian Hussars. This year, in a straight up fight,  the Wachovians and their Schoeffen-Buschhagen allies routed the Yellow Hussars in 1 turn of melee taking several prisoners and driving them under strength. OH the humanity! At least I now have a reason to paint up a new light cavalry regiment, I'm thinking Uhlans.  Anyone want to buy 20 slightly used Hussars?  I suppose I could just melt down every 1oth man........


Infantry Tactics. The 3rd was an example of simple rules working effectively. It just doesn't pay in Charge! to be in a hurry when the enemy is nearby unless you are pressing an assault.  On several occasions, Northern Alliance infantry, in their rush to get at the enemy, moved forward full speed, in penny packets, either in line, or deploying from column as they went, when the enemy were advancing in good order at a measured pace (i.e. 6") towards them from outside musket range. The result? The Pragmatic infantry were able to unleash their initial volleys without reply. On the other side, the infantry had not only been unable to fire, they had also been unable to close to the point where they could charge next turn without defensive fire.  Luckily for the Northern Alliance, numbers told as wave after wave was fed in  but either an orderly advance in line in 18thC fashion, a massed assault by overwhelming numbers or a rush in column from beyond musket range to within in 3"  would likely have served their purpose  with fewer casualties and more effect.


Command & Control. The last was  an example of how command and control rules aren't really needed in a multi-player setting.  The Carabiniers were tasked with protecting the left flank of the Northern infantry. After some bumping and shuffling, they eventually cleared the way and took up positions just inside cannister range from the forts guns, facing down any attempt to sally from the fort onto the flank of the infantry.  Despite some increasingly less subtle hints that the rules allowed them to fall back the necessary inch to reduce their losses, they stalwartly maintained their position.  Even the approach of the undefended convoy, moving past their flank and towards their front was insufficient to elicit a squadron to run them over. Finally the rallied remnants of the  Schoeffen-Buschhagen Dragoons hit them in the flank just as more cavalry finally sallied from the fort, hitting them as they rallied. 


In the end, the Voluntaires de St. Lambert, under the command of the same player,  pushed through a gap in the lines, nabbed the last 3 wagons and beat off a rescue attempt by the Pragmatic Hussars.  A draw despite the best efforts of both sides.
    
I think this is long enough for 1 entry so tomorrow I will start on the siege games.